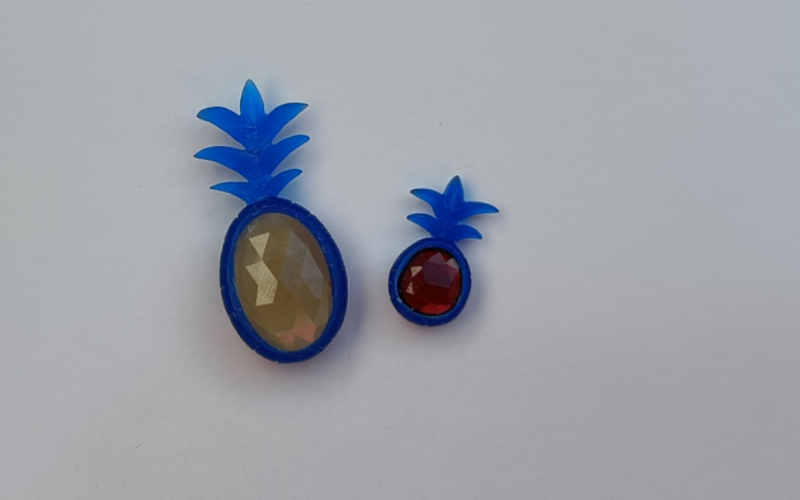
Make bezel settings: rosecut and cabochon
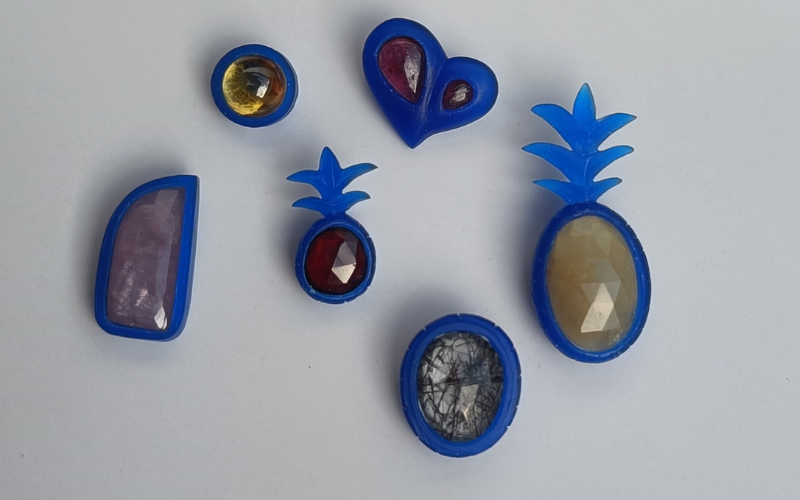
You have some carving experience and want to improve. Learning to make settings for rosecut and cabochon gemstones is a perfect way to expand your carving skills! You learn everything that goes into making a setting. And by using the wax to its fullest potential you can carve some fun elaborate pieces.
Don't like rosecut and cabochon gemstones? Then have a look at settings for faceted gemstones.
So what are some of the techniques you learn when you carve bezel settings?
Start with some basics
Before you start carving, you need to prepare your piece of wax.
Wax thickness: Unfortunately, every stone has different wax thickness requirements. There is no 1 size fits all. The wax needs to be thick enough that you can create a high enough setting wall and a seat for the stone to sit on.
You also need to consider the design you’re going for. A plain flat back straight wall setting needs less wax thickness than a setting where you want to shape the back for example.
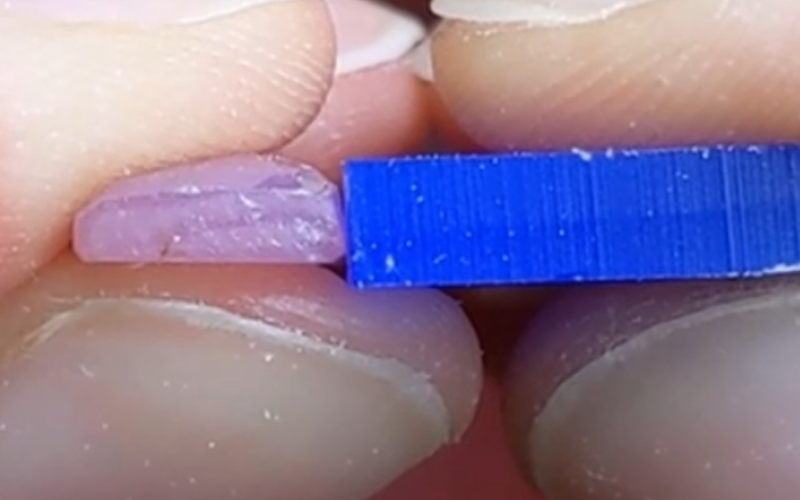
Attach stone: In order to get the outline of the stone on the wax, you need to attach the stone to it first. You can use glue at your own risk (check beforehand to make sure that your stone won’t get damaged by glue!) or you can use beeswax.
Yes, you read that right. It sounds like it shouldn’t work, but it does! Beeswax is perfect for attaching stones to wax securely and when you’re done you can scrape it off and reuse it.
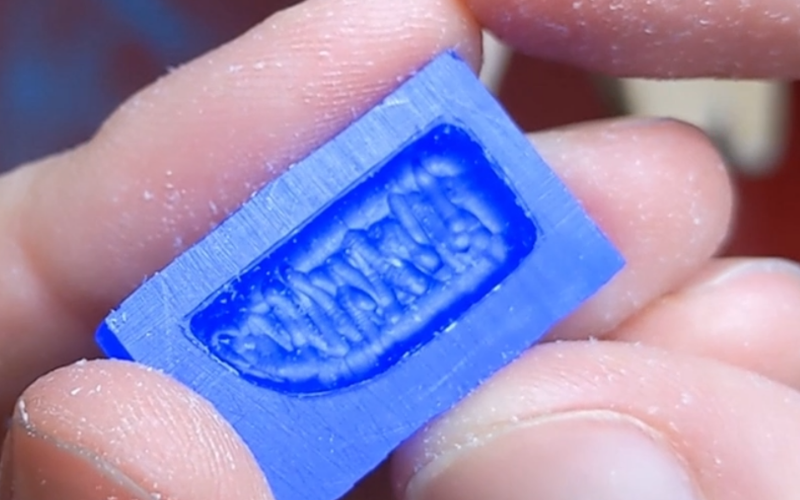
Scribe the outline: Now that the stone is attached you can scribe around the stone to get your outline on the wax. Just make sure that your angle is correct and the stone doesn’t accidentally move during scribing!
Scribing the outline sounds easy, and it is after you’ve practiced it a few times. But it is so important! Creating a seat for the stone depends on the accuracy of your outline. If the outline doesn’t follow the shape of the stone exactly, the seat you create won’t be the shape of the stone. In other words, the stone won’t fit inside its setting.
Learn now how to scribe good outlines of your stones and make everything that comes after easier for yourself.
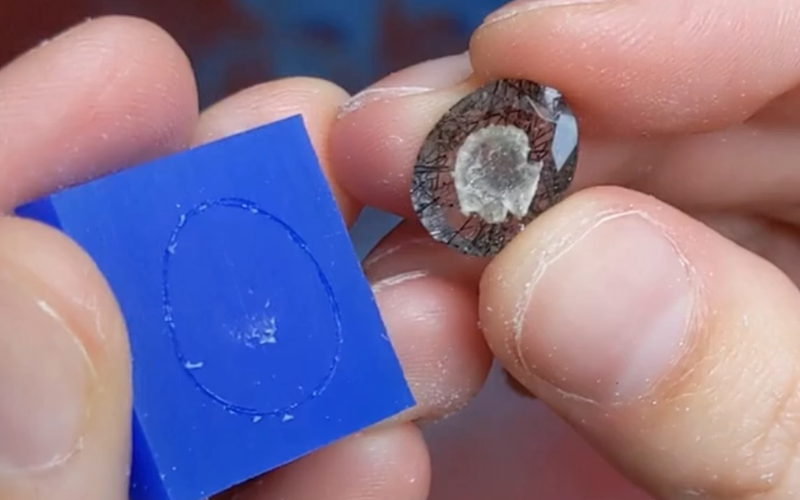
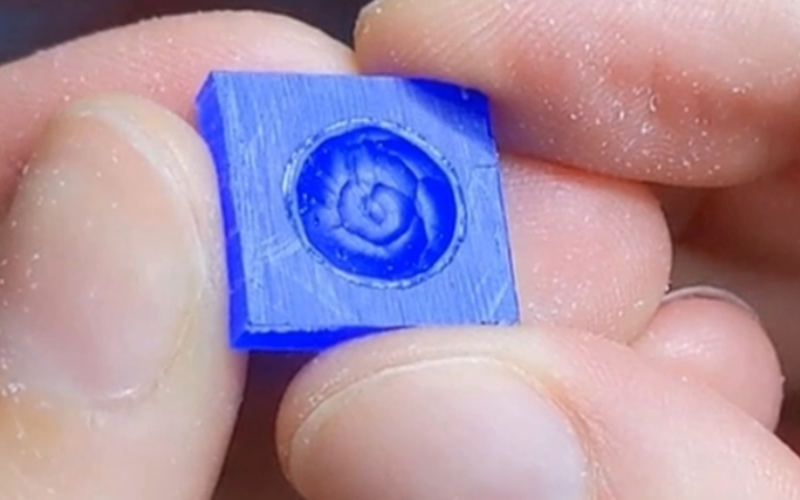
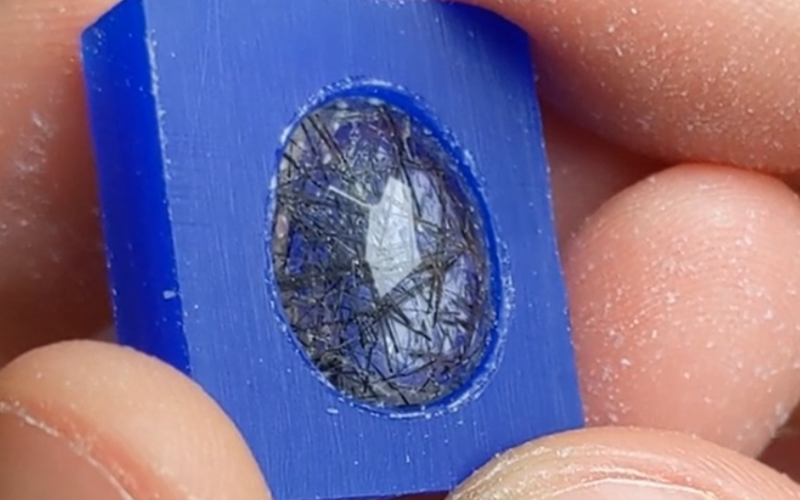
Create a seat for the stone
Make a hole and drop the stone in right? Sure. As long as you make the hole the correct shape, size and depth.
Shape: Carving a seat for any shape gemstone can be hard. You can have 90% of the shape perfect, but if the last 10% is wrong the stone won’t fit. Or the stone will fit but there is a gap at the imperfect side. The shape of the seat needs to be the same as the shape of your gemstone. And yes, corners are more difficult to carve than curves!
Size: A seat can be the correct shape, but not the correct size. If it’s too big, the stone will move and you can’t set it securely. If it’s too small, the stone won’t fit inside it. Or it goes in crookedly and gets stuck. Or worse, the gemstone breaks when you try to force it in.
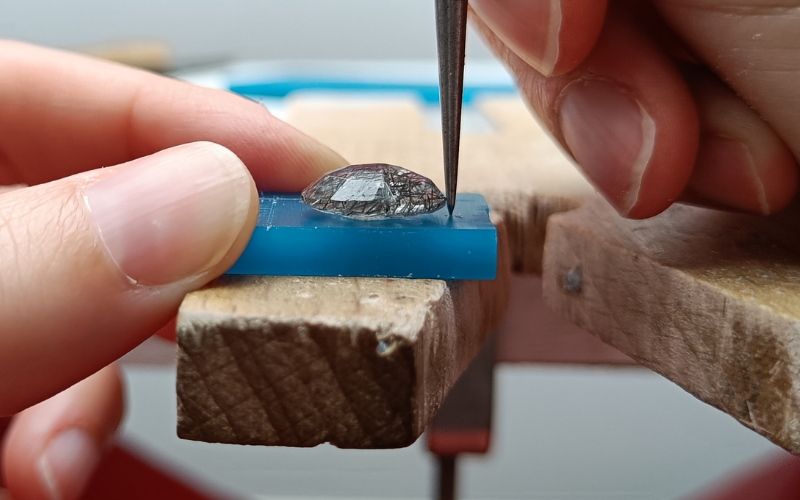
Depth: The stone needs to be deep enough inside the setting that there is enough of a setting wall around the stone. Because when you get it back in metal, that’s what’s going to hold the stone in place.
Getting the correct shape, size and depth work together in carving a seat for the stone. Don’t rush it, check often and work in stages. You can learn all of that in this class.
Now that we got the inside covered, let’s work on...
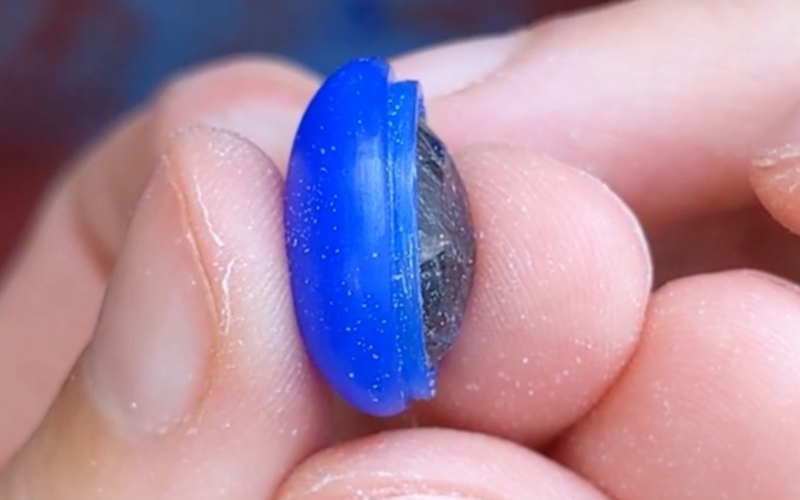
Shaping the outside
Carve away wax from the outside to create the setting wall. You want to leave the wall thick enough that you have material to play with in case of shrinkage!
You can finish the outside with straight walls and a flat backplate, but you can easily do that in metal. So why not try something that will be easy in wax, but more difficult in metal? Like rounding the back of the setting.
And just because the seat needs to be the same shape as the stone, doesn’t mean that the outside has to be the exact same shape as the stone. The wax is there. Play around with it and find the outside shape you want.
3D shape
This is nice and all, but very time-consuming. I can whip up a bezel in metal in a lot less time! True, making a straight walled, flat backplate bezel is quicker in metal.
That’s why you should use the wax and have some fun!
Don’t just make a plain bezel, add something and make it special. Incorporate the stone into your overall design. You can get super elaborate without the need to solder later!
Learn how to use the wax to its fullest potential here and make some fun shapes. Spoiler alert: I do break a few things so you can also learn how to fix breakages here!
In short
You learn how to create a seat that follows the shape of the stone perfectly and some outsides that don’t follow the shape of the stone perfectly. Have fun and play with the wax. Who knows what you can come up with!
Feel inspired to learn all this? You can buy the rosecut and cabochon bezel setting class now!