Introduction to piercing wax
Choose your saw blade
There are 3 different types of saw blades you can use for piercing wax: spiral wax blade, skip-a-tooth blade, and the regular saw blades you use on metal as well.
Spiral blade
The blade is spiraled so there are teeth in every direction. That means it’s not just piercing wax away in front of the blade, but also from the sides. Piercing with this is definitely the quickest. And because it pierces wax from the sides as well, the blade doesn’t get stuck in the wax easily.
This blade is great for piercing through thick pieces of wax, but it’s not great for any delicate work. The spiral structure leaves an uneven jaggedy surface behind. Not great for precision work.
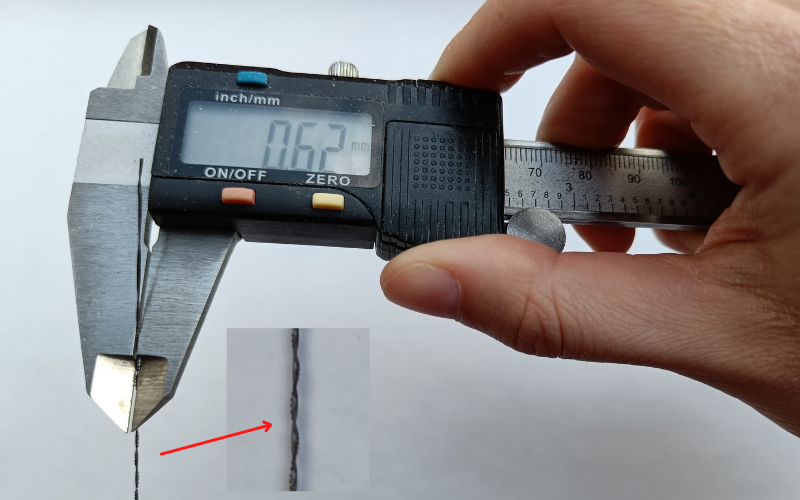
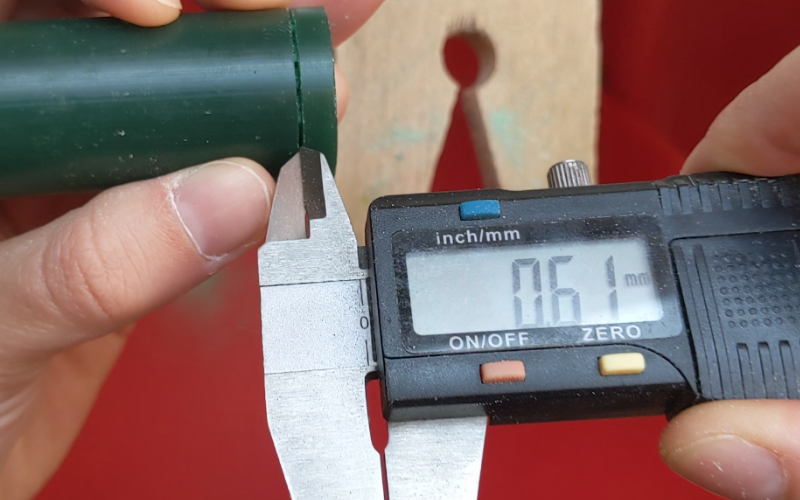
The blade is thick at around .6mm. Add the fact that the blade cuts the sides as well, it leaves a pretty wide gap of almost 1mm.
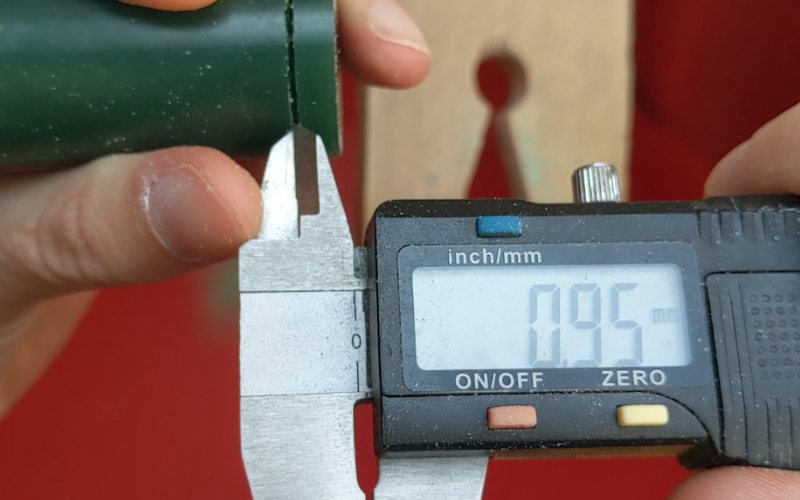
That's not necessarily a problem. But it is something you have to keep in mind when calculating your margins for piercing and filing your piece.
Skip-a-tooth blade
This saw blade misses every other tooth. That makes the distance between each tooth bigger, so the wax doesn’t clog the teeth as quickly.
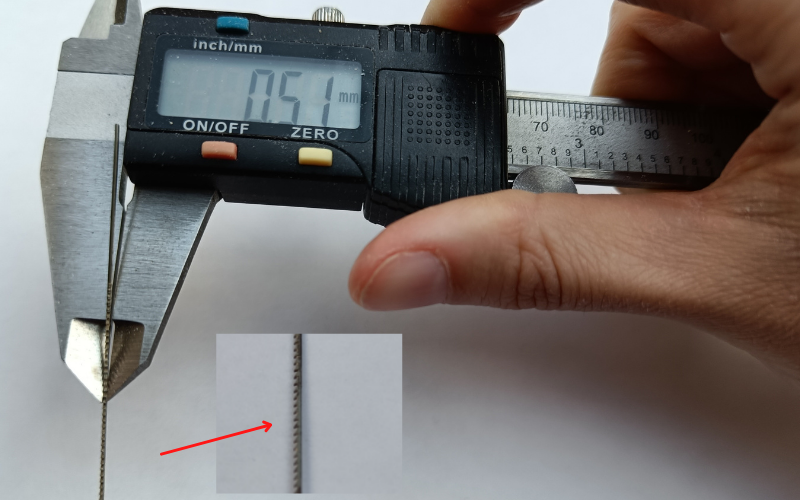
It’s not as quick as the spiral blade, but because the teeth only face forward, there’s a little more control and precision with this saw blade.
Regular blade
Just the saw blade you use for piercing metal. It’s not quick. The teeth clog, and the blade gets stuck in the wax.
But it's your best choice for any precisions work. Piercing a corner, getting really close to your marks, piercing out a design. You get the cleanest and sharpest finish with a regular blade.
Personally, I use a spiral or skip-a-tooth blade for any big work. Think piercing a wax block or ring tube. For everything else I use a regular saw blade. The precision it gives is more important to me than speed.
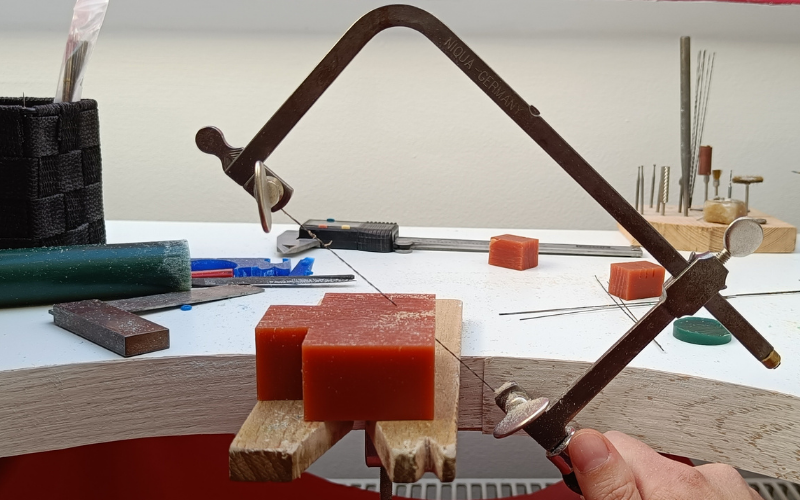
Pierce at an angle
The first thing you learn when piercing metal is to always always always keep your saw perpendicular to the metal. That is not the case for piercing wax! You can angle your saw as much as you want to make piercing easier.
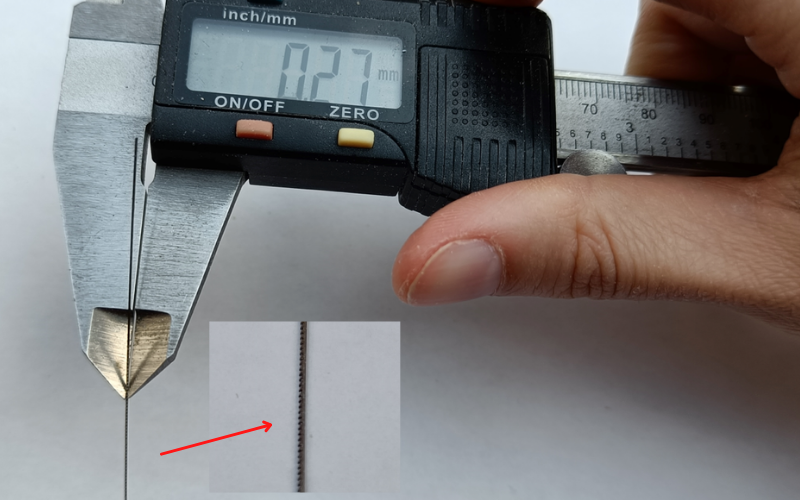
Wax is thick, much thicker than metal. Ring tubes start at 27mm and blocks and bangle waxes can go to around 80mm. Do you want to pierce something that is 27mm? Of course not! That's why you make the distance you’re piercing smaller by angling your sawframe.
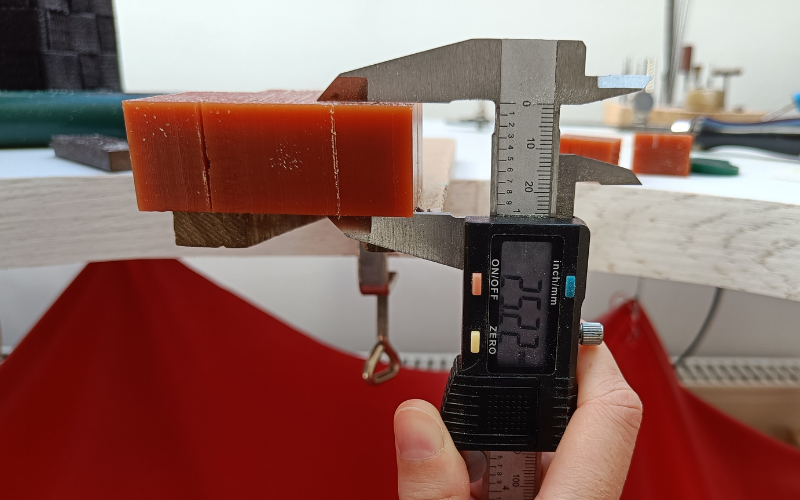
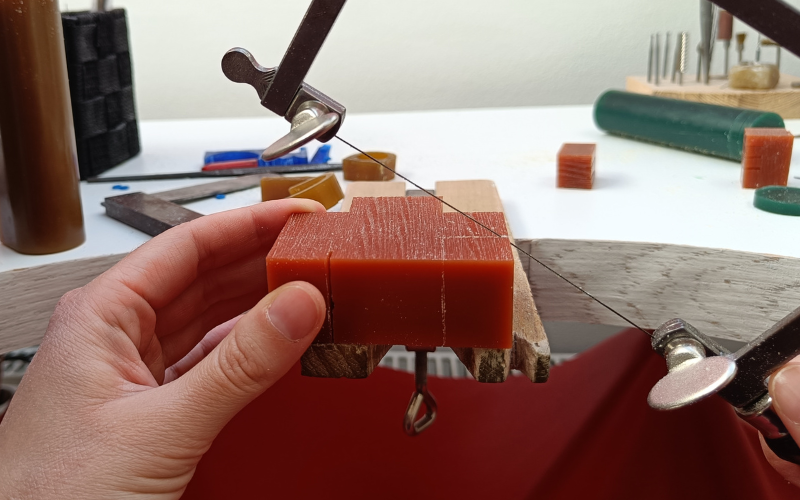
This block is 25mm. Instead of piercing the full 25mm, I angle my saw frame and only pierce the corner. This way I only pierce 5mm.
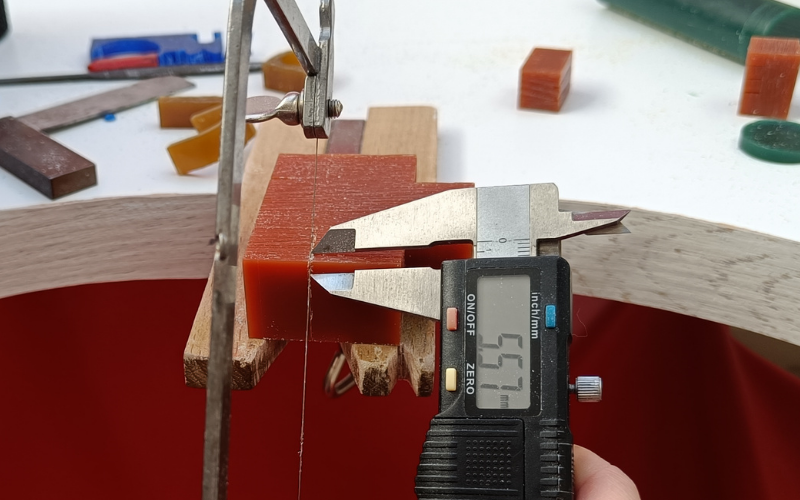
I keep going at an angle and still I'm piercing less than the full thickness of the wax.
I can angle the saw however I want to pierce the least amount of wax with every stroke. Piercing is so much quicker and easier this way.
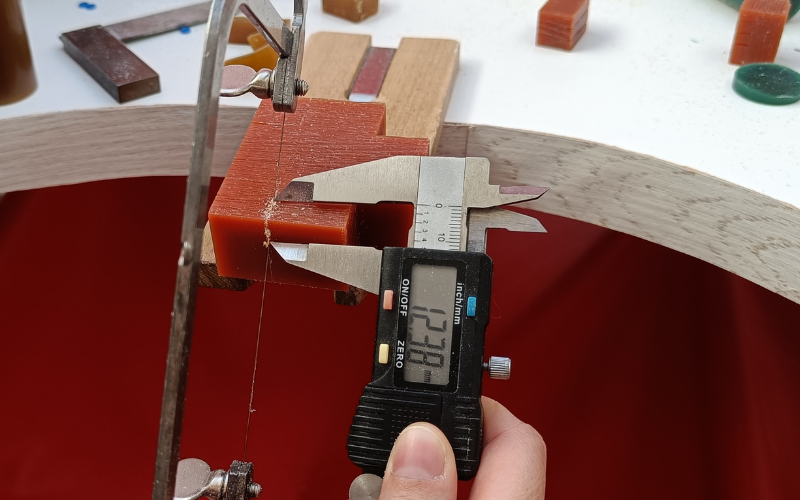
Now at some point the piercing thickness becomes too much, no matter how I angle my saw. That is why you don’t just pierce at an angle, but also...
Pierce from different directions
I pierced one corner until it became too much. Now I turn the piece and do the same on the other corner!
I keep changing the direction I’m piercing from and change the angle throughout as well. All to make the amount of wax I’m piercing at any time is the smallest possible. At some point you even have your saw perpendicular to the wax!
While doing this, you want to make sure that your ends line up together. That’s why I like to...
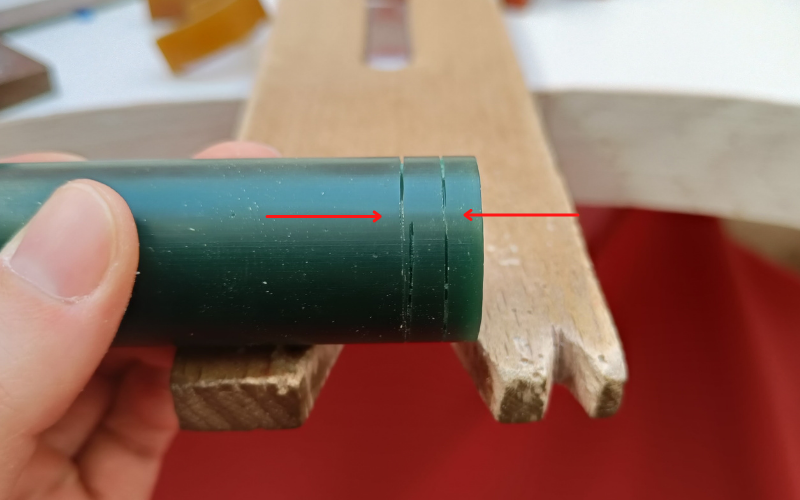
Pierce a guide
It's easy enough to see if your ends are lining up when you're piercing a block, because you can see where your mark goes. But when you're piercing a ringtube your mark disappears around the curve.
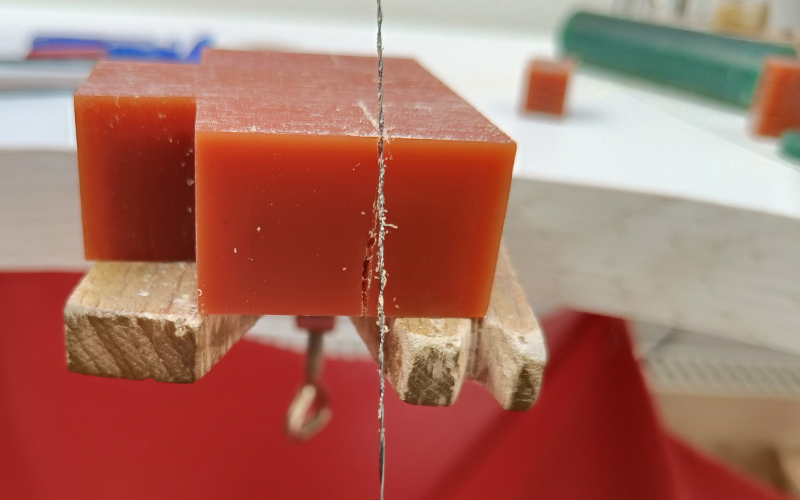
That's why before I start piercing deep, I make a shallow guide all the way around. To make sure my ends line up together.
If the ends don't line up and the guide is only shallow, I can make adjustments and pierce through straight. But if it's already pierced deep in the wax, you'll end up with a crookedly pierced piece.
Another benefit of a guide, is that the sawblade now has a groove to stay in. As long as the saw blade stays in the groove while you continue piercing, you'll pierce through straight.
If you’re having trouble making your guide...
Use the saw blade upside down
Instead of pulling down on your saw, push your saw up to leave a shallow saw mark. You have more control because the teeth are not trying to bite into the wax.
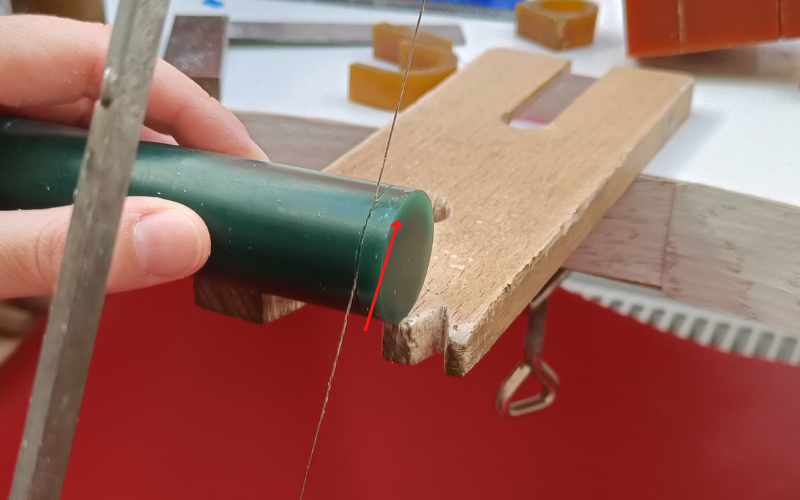
And because the teeth are not going in the wax that much, the groove ends up shallow.
Good tension on blade
Before you start piercing, make sure your saw blade is in tight tight tight. If it’s even a little loose, the wax pulls it looser. And as soon as the saw blade is loose it’s harder to pierce straight. A loose blade always leads to crooked piercing.
Why pierce when you can burr?
Some people burr away all the excess wax instead of piercing it away. I always pierce away excess wax before I clean it up to the line by filing.
-
I think it’s quicker. I get rid of a big chunk of wax in one go and then take my time getting it perfect.
-
I can reuse the offcuts for other projects. If I burr it away it’s wax dust that I can’t use for anything unless I remelt it. If I pierce away wax, I can reuse it as is.
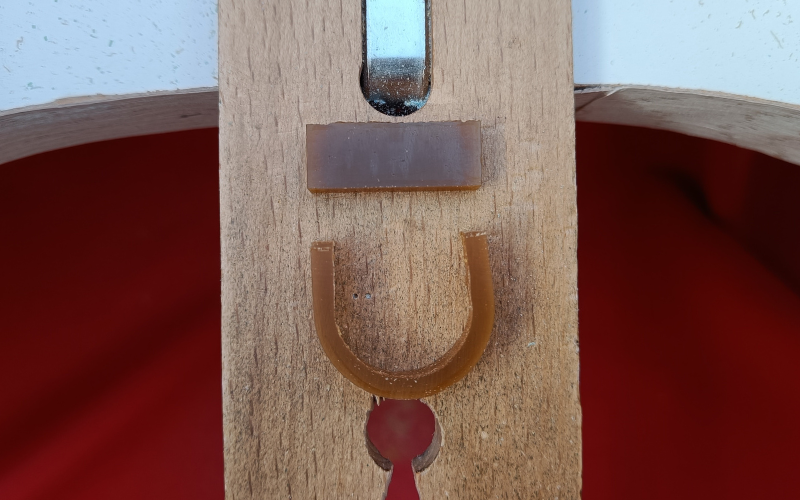
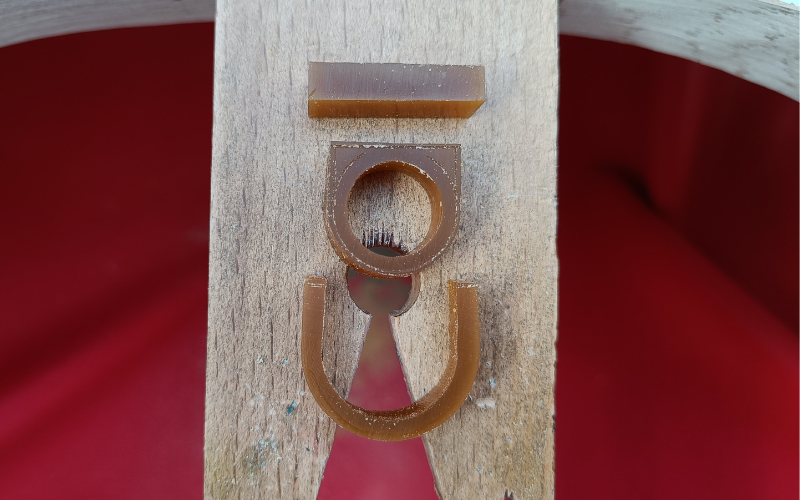
Look at this perfectly flat piece of wax that I pierced off the top of a ring. I can use this to make charms or settings.
Even the oddly shaped pieces that don’t look like I can get an easy use out of I keep. I use them for practice. New texture idea that I don’t know will work out? Try it out on scrap. Not sure of dimensions? Try it out on scrap. Need to practice something I’m not good at? Try it out on scrap!
Comment below and let me know what your favourite tip was. And if you have any additional piercing tips let me know for a part 2 on piercing tips and tricks!