Make jewellery with beads
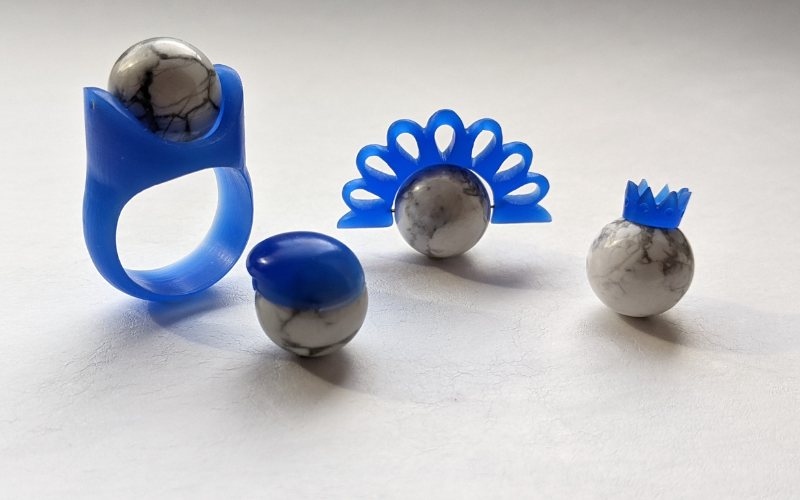
You have some carving experience and want to improve. Learning to carve jewellery for beads is a perfect way to expand your skills. You learn all about making fitting bead caps, and how to make pieces where the bead can move freely!
So, what are some of the skills you learn in this class?
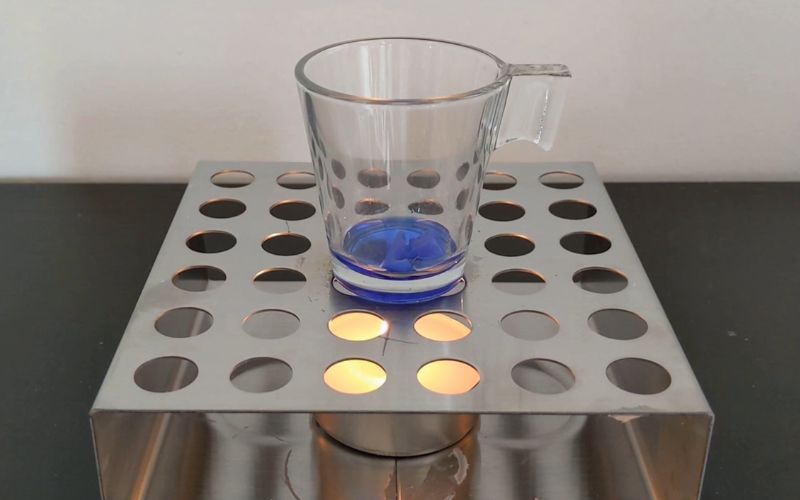
Dipping
Do you have a box with small scrap pieces of wax that you don’t know what to do with? Look no further! Put them in a small glass or mug, place it on top of a tealight and watch the wax melt.
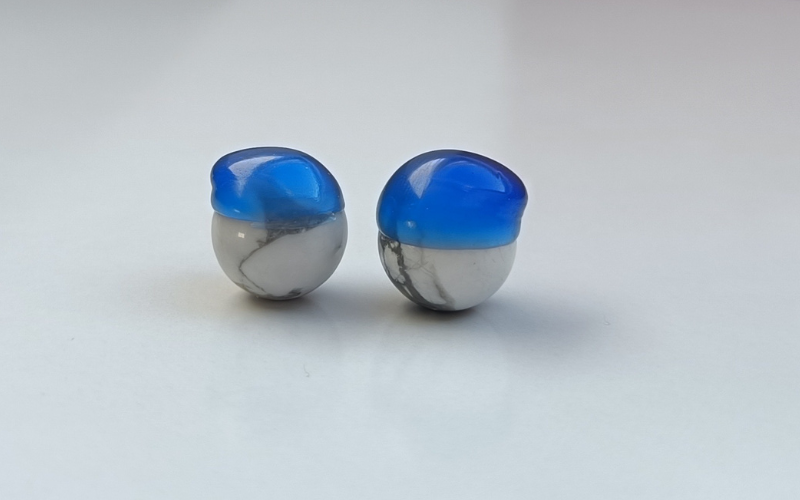
Dip your bead in the liquid wax, pull it out and voila! Complete bead cap!
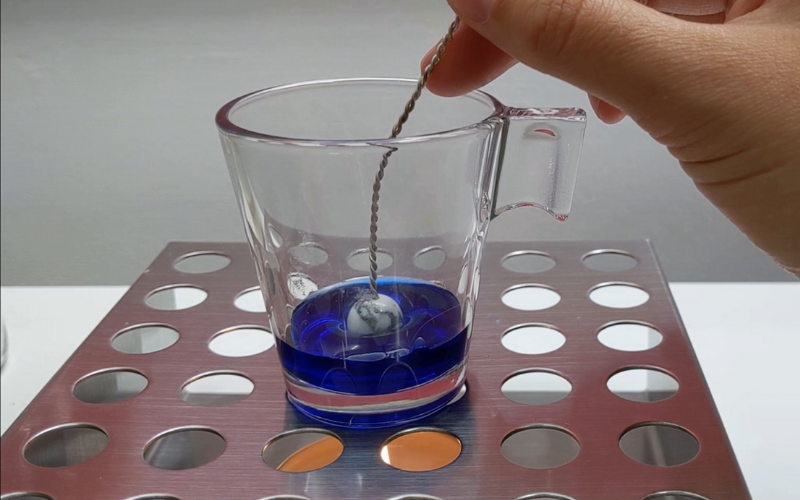
The way you pull the bead from the liquid wax decides how the bead cap looks from the outside. So experiment! It’s quick, it’s easy, and if you don’t like the bead cap you just put it back in the glass to remelt.
Off course there are multiple ways to create a bead cap. If you want more control over the way your bead cap looks on the outside, you’re better off making it in 2 stages.
Perfect fit
It’s so easy to get the perfect impression of your bead in wax! A little bit of heat, a few seconds of absolute stillness, and you have the perfect fit for your bead!
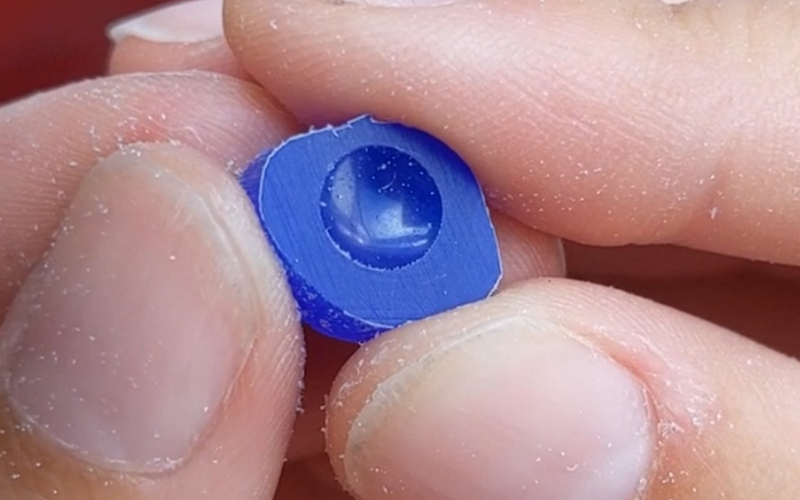
If you’re not happy with the fit because it’s too shallow or you accidentally moved and it’s a bit uneven, you can just reheat and try again!
The examples in the photos are all for round beads. But these techniques of creating the inside fit, work on any shape. You can see it in the class!
Learn how to create the perfect fit for any shape bead now.
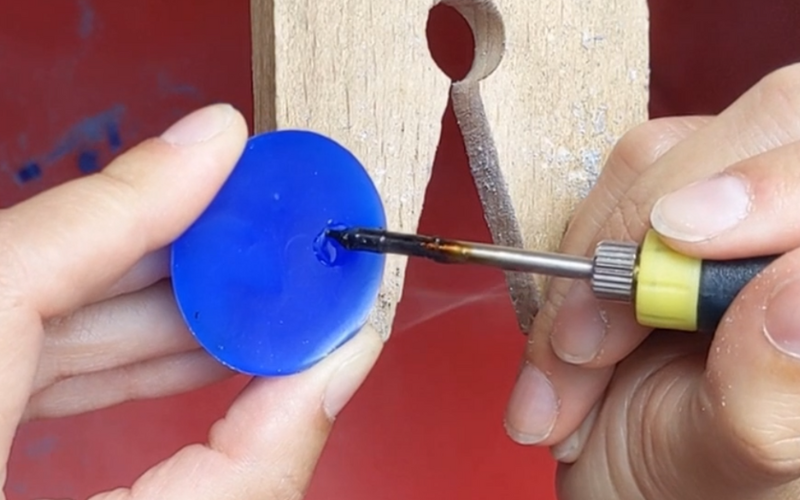
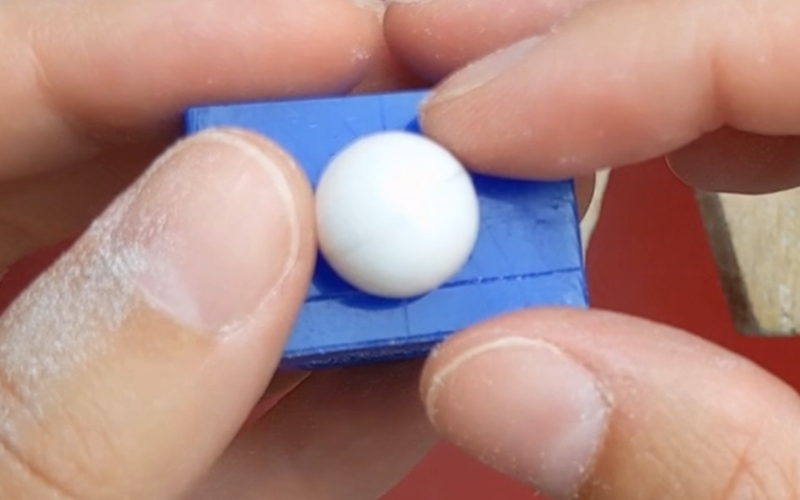
Shape the outside
When you have the perfect fit on the inside of the bead cap you can shape the outside to your liking.
There are so many things you could do here. Just be careful that you don’t damage the inside!

In the class you learn how to turn the bead cap into a crown. Perfect for a queen bead!
Let it spin
Bead caps are nice and all, but what else can you make with beads?
If you’re like me there’s only one thing you want to make with fully drilled beads: a piece where the bead can spin!
Size: when you design your piece, you have to consider the size of your bead, how much wax is going to be around it, and where you’re going to attach it. Nothing worse than being halfway through a project, only to realise you don’t have enough wax to do what you want to do!
Opening: the most important part is the place where the bead will spin. You can make it a complete circle opening, or only a half circle. Just make sure the drill hole in the bead lines up with wax!
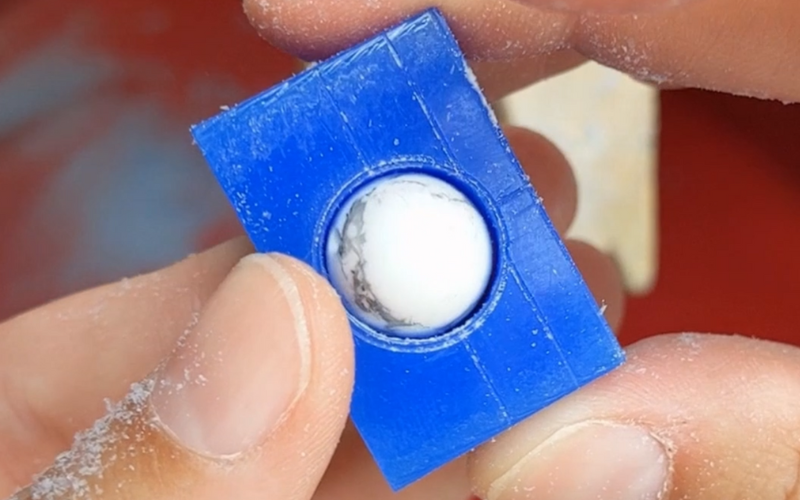
You want to make the opening slightly bigger than the bead. The bead should spin freely without scraping along the wax. If the bead scrapes along the inside it gets damaged.
If the opening is too wide, the wire your bead is rolling on can easily get bent out of shape and break.
A little bigger is perfect to keep the bead secure and protected.
Attach: when finished, the bead spins on a piece of wire that you rivet to your piece. You can prepare for this by drilling the holes for the rivet when it’s still in wax form.
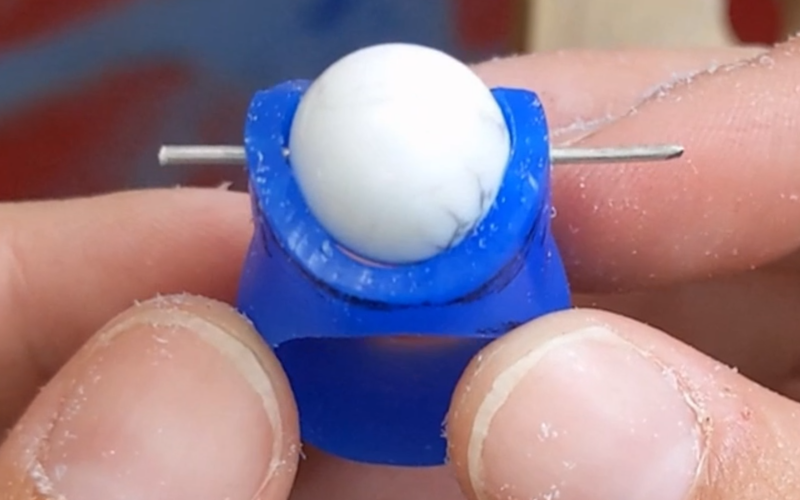
The bigger your bead, the more difficult it is to make sure your drill holes end up exactly in a straight line and at exactly the same height. Take your time here and check often! You’ll know if the drill holes aren’t aligned properly by the way the bead spins!
In Short
You learn how to make sure your bead is secure and how to have fun with it.
Feel inspired to learn all this? You can buy the beads class now!