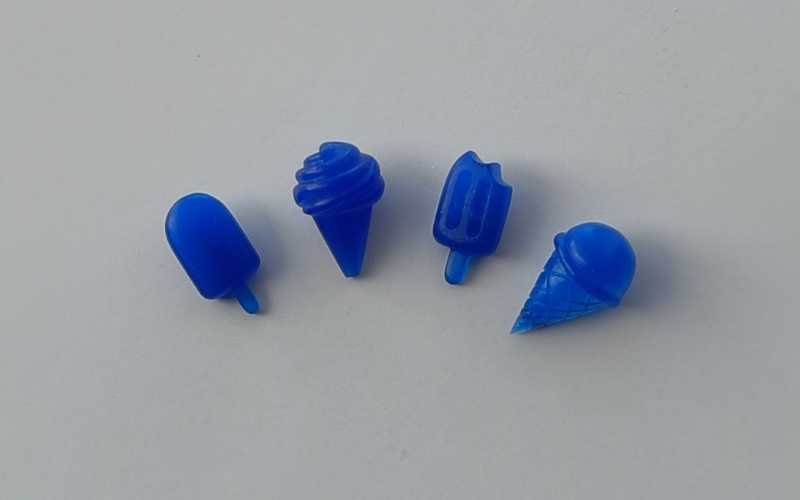
3D carving beginnings: charms
Wax is the perfect medium to create 3d shapes. It’s quicker, easier and more cost effective to carve 3d shapes in wax than straight into metal. And charms are a great place to start learning what goes into carving a 3d shape.
Because how do you turn a big block of wax into your amazing charm idea?
The key is in the preparation! Take some time and think about what your charm will look like and how you’re going to make it. It makes the actual carving of the charm so much easier.
Break it down
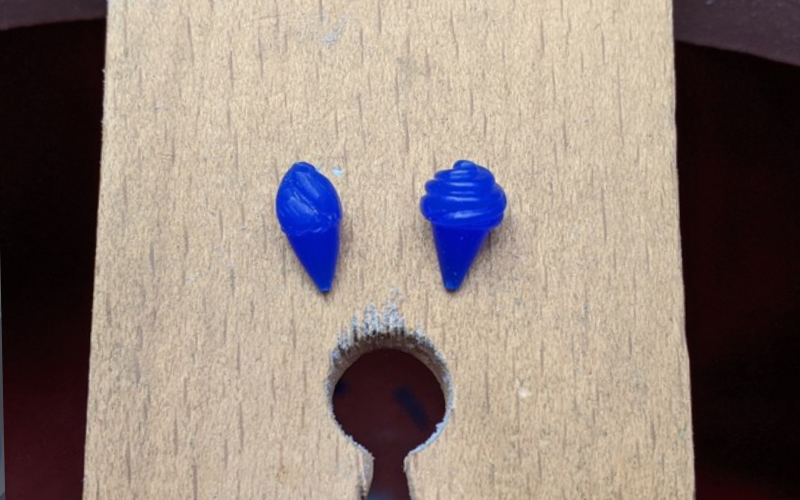
Draw the shape you want to make (or find an image of it online for those of us who can’t draw). Then look at the overall shape and break it down into smaller shapes. Any complex shape can be broken down into smaller easier shapes.
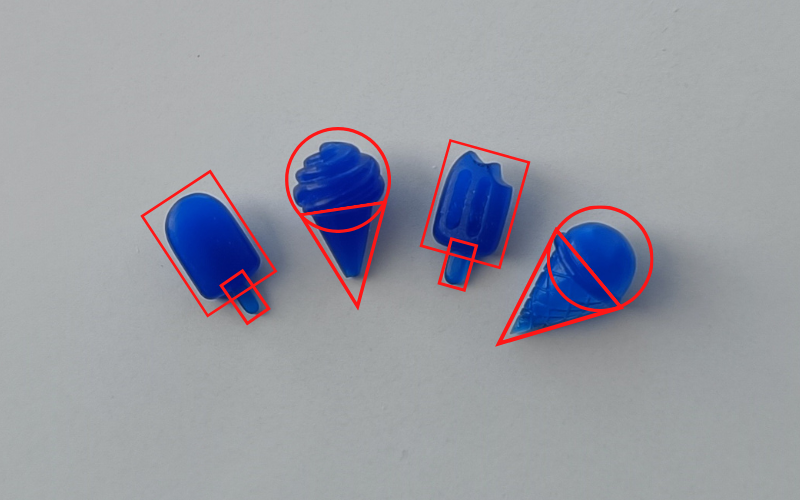
See? The ice cream charms are just rectangles, circles and triangles! And those are shapes you know.
Don’t get overwhelmed by the complexity of the overall shape. Find the small shapes and see how they fit together. Now that you've got the shape of your charm straight in your mind, it's time to make a decision.
Flat back?
One option is to keep the back of your charm flat. Doing this has some benefits.
It’s of course easier and quicker when you don’t have to worry about what the back of your charm looks like.
But more importantly, you can remove wax from the back. This makes the charm lighter and it lowers the metal costs. Removing weight is something you can do with other jewellery pieces as well. So learn how to safely remove wax weight here.
Or full 3D?
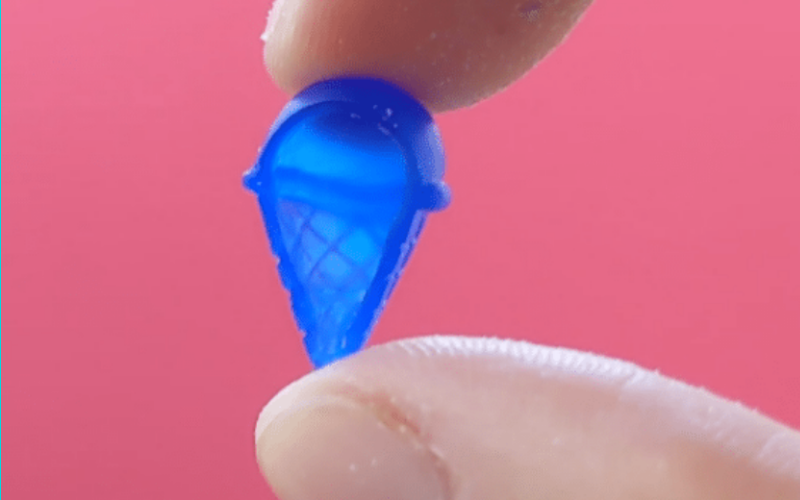
Another option is to make a full 3-dimensional charm. Something you can look at and admire from every angle.
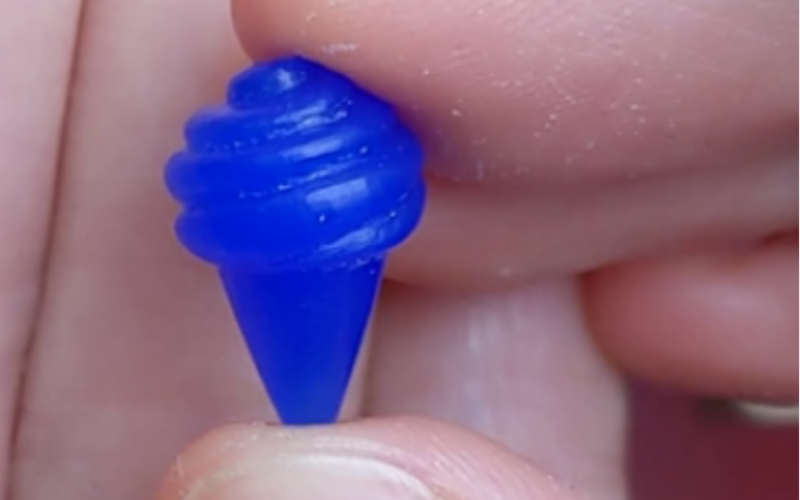
Making sure your charm looks good from EVERY possible angle is a lot more work. But also more fun! Think of all the details you can add.
Carving a full 3d charm might not be something you can do all the time. But learn how to carve it now and you always have the option to do it.
Think it through
Now that you know what your charm is going to look like, it’s time to think about how you’re going to do it. Where do you start carving?
The easiest thing is to go from big to small. Remove big sections of wax, shape what remains and finally add the details.
Writing it down like this makes it sound like an easy straightforward process. But in reality, there’s a lot of back and forth between the steps.
Because you can’t shape the wax if you remove too much of it straight away. And a flat piece is easier to hold than round, so maybe leave the rounding to the end.
Thinking your whole process through can help you prevent some mistakes. And prepare you for the difficult parts of the carving process.
File a perfect cube
The elusive perfect cube. 6 Perfectly flat sides all perfectly measuring the same size and all at perfect 90 degree angles with each other. Sound difficult? That's because it is difficult to file a perfect cube.
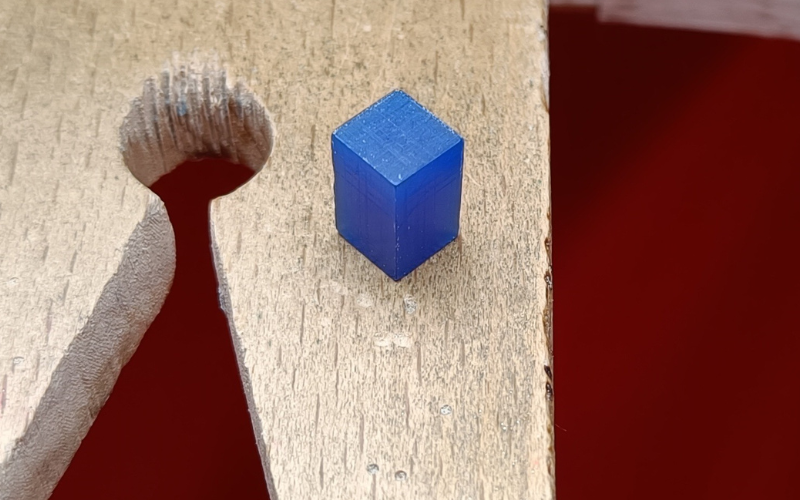
Luckily, you don’t need to start from a perfect cube for all charm shapes. But sometimes it has to be done. Start symmetrical and you end up symmetrical. Start crooked and it’s going to be very difficult to end up symmetrical.
Anything symmetrical, geometrical and with precise measurements will be easier to carve if you start from a perfect cube.
Is filing a perfect cube fun? Not really. But you learn SO MUCH from it! Learn how to do it now, and you won’t think twice about using a set square in the future.
Learn from your mistakes
Even when you follow all of the steps, the first time you carve a new shape might not work out as you hoped.
It can be any number of things.
Maybe the base shape isn’t a circle but more of an oval?
Maybe the proportions are off?
Maybe you should’ve started with a perfect cube?
Maybe you removed too much wax too quickly?
And sometimes, there’s nothing really wrong you’re just not feeling it!
The only thing left to do is really look at your charm and find what it is you don’t like about it. Once you’ve found these improvement points, think about what you are going to do the second time around to make it look better.
Point is your first attempt is not a failure, it’s your learning piece! So learn everything you can from it!
In short
You learn how to prepare and how to do a debrief with yourself when it doesn’t go according to plan. And in the middle? In the middle you actually learn how to make the ice cream charms as well. Perfect right?
Feel inspired to learn all this? You can buy the charms class now!